 Daniel Mitchell
Key Takeaways
- A clogged grease filter restricts airflow, strains the fan motor and is a genuine fire risk near an electrical assembly.
- Most metal grease filters are dishwasher-safe and should be cleaned every one to three months with regular cooking.
- A charcoal filter only exists on ductless, recirculating installations, and it must be replaced, not washed, every six to twelve months.
- Neither filter problem shows up as an error code, which is why this is a maintenance topic rather than a common-problems one.
- A neglected filter can eventually damage the fan motor or scorch nearby wiring, turning a free maintenance task into a paid repair.
The Bottom Line
Clean the metal grease filter monthly to quarterly and replace a charcoal filter (recirculating models only) every six to twelve months. Both are homeowner jobs, and both are cheaper than the fan motor repair that neglecting them eventually causes.
An over-the-range KitchenAid microwave does two jobs at once: it cooks, and it vents the cooktop below it. The second job depends entirely on two filters most owners never think about until the kitchen starts smelling like whatever was cooked three nights ago — a metal grease filter that catches airborne oil, and, on models that recirculate air rather than vent outside, a charcoal filter that absorbs odor. Neither one is covered anywhere else on this site, and both are cheap, quick maintenance that prevents a much less pleasant repair later.
| Filter | What it does | How often |
|---|---|---|
| Metal grease filter | Traps airborne grease before it reaches the fan and motor | Every 1–3 months |
| Charcoal filter (ductless only) | Absorbs odor when air is recirculated, not vented outside | Every 6–12 months, not washable |
| Exhaust fan and motor | Moves air through both filters and out or around | Inspect yearly |
Why Does a Grease Filter Matter to a Microwave?
It matters because a clogged grease filter does not just smell bad — it restricts the airflow the exhaust fan is trying to move, which makes the fan motor work harder for less result, and grease buildup near an electrical fan motor is a fire risk that vent hoods and OTR microwaves are specifically designed to avoid through regular filter changes. The metal filter is also the first line of defense for the electronics higher up in the unit: grease that gets past a clogged filter settles on the fan blades and eventually migrates toward the microwave's own internal components.
None of this shows up as an error code, which is exactly why it belongs in a maintenance guide rather than a common-problems one — by the time a symptom appears, the filter has usually been overdue for a while. A microwave that has started running noticeably louder while venting, or one whose fan seems to labor on high settings it used to handle quietly, is often describing a grease-loaded filter and fan assembly rather than a motor that is actually wearing out.
How Do I Clean the Metal Grease Filter?
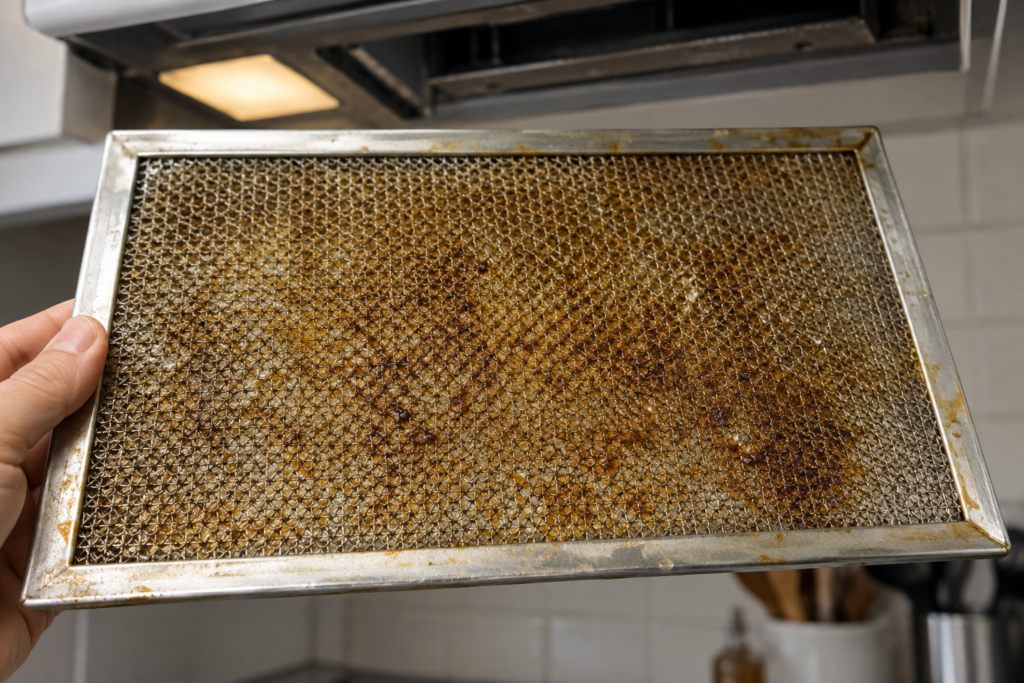
Most metal grease filters on KitchenAid over-the-range microwaves are dishwasher-safe, which is the easiest way to get them properly clean rather than just surface-wiped. Pull the filter or filters out from underneath the unit — they usually release with a small tab or slide out of a track — and run them through a normal dishwasher cycle, or hand-wash with hot water and degreasing dish soap if you would rather not put metal filters in with dishes.
- Check the filter monthly if you cook with oil frequently; every three months is the minimum for light use.
- Soak stubborn buildup in hot water with degreaser before scrubbing rather than forcing it off dry.
- Let it dry fully before reinstalling — trapped moisture attracts more grease, not less.
- Replace a warped or bent filter rather than continuing to use one that no longer seats correctly in its track.
- Wipe the cavity behind the filter while it is out — grease collects there too, not only on the filter mesh itself.
- Check the fan blades if you can see them once the filter is removed, since heavy buildup there means the filter alone was not keeping up.
A filter that will not come clean no matter how long it soaks has usually reached the end of its useful life rather than needing a longer soak. Aluminum mesh filters lose their trapping ability as the mesh itself becomes coated in baked-on residue that a dishwasher cycle can no longer fully lift, and at that point replacement is cheaper than the electricity and time spent trying to restore a filter that is functionally done. Most models take a standard replacement filter sized to the unit, and having a spare on hand means a stubborn one can be swapped immediately rather than run dirty for another week while a replacement ships.
Do I Have a Charcoal Filter Too?
Only if the unit is installed as a ductless, recirculating model rather than vented to the outside. A vented installation pushes air (and the grease and odor riding along with it) outside through ductwork, and those units typically do not carry a charcoal filter at all. A recirculating installation pulls air through the grease filter, through a charcoal filter to pull out odor, and back into the kitchen — and that charcoal filter is not washable. It absorbs odor until it is saturated and then simply stops working, quietly, with no warning.
- Check your installation type first. Look for ductwork above the unit; its absence usually means recirculating.
- Replace, do not wash, a charcoal filter. Washing does not restore its absorption capacity.
- Set a reminder every six to twelve months rather than waiting for a smell to prompt it — by the time you notice, it has been saturated for a while.
- Keep the grease filter clean regardless, since a clogged grease filter shortens the charcoal filter's working life by loading it with grease it was never meant to filter.
- Label the install date on a new charcoal filter with a marker, since the interval is long enough to forget otherwise.
- Buy a spare in advance if your model uses an uncommon filter size, so a saturated filter does not sit in place for weeks waiting on a part.
It is worth checking your specific model's installation manual once, rather than guessing, because some KitchenAid over-the-range units ship convertible between vented and recirculating configurations depending on how the kitchen was built, and a homeowner who moved into a house rather than installing the unit themselves may not know which mode theirs is actually running in. That single fact changes the entire maintenance schedule above, since a vented unit in recirculating mode — or the reverse — will show symptoms this guide does not fully explain. A quick way to tell in the field: pull the metal grease filter and look up into the cavity above it. Open ductwork leading toward the roof or an exterior wall means vented; a solid cap with a charcoal cartridge visible means recirculating.
KitchenAid Microwave Grease Filter Maintenance: When It Becomes a Repair
Filter cleaning and replacement are homeowner jobs, start to finish, and they are the cheapest maintenance on this appliance by a wide margin. What is not homeowner work is a fan motor that has already been damaged by prolonged grease exposure, or wiring near the fan assembly that shows scorching — both are signs the filters were neglected long enough for the problem to move past the filter itself. Our KitchenAid microwave repair service and, where the hood's own fan assembly is the concern, our range hood repair service both start with a diagnostic from $95.
If the microwave itself is showing a fault code rather than a filter problem, our KitchenAid PF code guide and related pages cover those separately, and our broader appliance diagnostics visit is the right starting point whenever the cause is not yet clear. For the filters themselves, this is one repair worth avoiding entirely rather than scheduling — book a visit only if cleaning has not solved a persistent smell or a struggling fan, and ask us if you are not sure which filter type your model uses.